Still Developing

" A lot of my enjoyment of photography comes from learning. This is typically done through talking with others, reading books, magazine articles, blogs, etc. Part of the balance of having so much good information available (especially the writings that people make available for free online) is to contribute back by writing anything that I learn or experience. If you get something out of this great. If you care to comment to correct my many mistakes, I would greatly appreciate it. Landscape photography can be a lonely occupation but the conversations we have more than make up for that. "

Wednesday
28 October 2009
No Comments

In the Woods – Eigg but no Rhum

On the second day me, Tamara Kuziminski and Dav Thomas wandered inland to have a look at a forest path that Richard had told us about. On the way to the path, we stopped to taste some blackberries (Banana flavoured ones! Really!) and saw a wonderful old, overgrown croft house surrounded by wild Fuschia. I tried to capture the blanket of fallen flowers but I couldn’t get any clear compositions using the shapes of the fuschia. As I wandered past the window of the house, I noticed that a stand of beech trees in the background was being subtly lit and the incongruity of looking into a house and seeing trees attracted me to the window, which was framed by fuschi flowers. I focused on the flowers at the bottom, dropping the wall out of focus, and tilted so that I would have some of the top of the wall in focus but more importantly the rest of the fushchia would be in focus and my depth of field would include more of the trees at the back of the picture (if I had focused just on the flowers, I would have ended up with the rear trees being too out of focus. It was also good to get some definition to the top of the window frame).

Our trip continued on to the forest road where we found that the edges of the road had grown wild with birch, elder, etc. all sitting in front of a dark green Sitka Spruce wall. We managed to cover about half a mile in four hours, finding interest every hundred yards or so. The most interesting section was where the forest had been cut back, with heather and bramble growing over the rows of stumps and through the dead fir branches. Dav got an excellent shot of the end of the forest and I was happy with some heather and a few sticks..

That evening we went back to the Angry place and I still had problems finding anything I could put into a picture. The main problem was Rhum. It just sits there on the horizon, taking up most of the view. You either have to include it completely or exclude it; unfortunately excluding it didn’t leave much photographically. I took a picture looking left towards the Sgurr but I’m not 100% happy with it (the clouds aren’t working with the view, the light isn’t right and Velvia has given it a slightly psychedlic feel when it needed something a bit foreboding – a black and white from the previous day looks better although the composition wasn’t amazing). I did manage to forget my head lamp yet again so an even darker and more dangerous journey back added to the elated feeling upon finally returning to the house for thai green curry, cups of coffee and some picture browsing [and no Jenny – they aren’t rejects 😉 ].

The Problem With Rhum

The issue with going to a place where you are working in a small area with such a big feature is that it’s difficult to avoid. Rhum is a lot bigger than it looks in the photographs you see. You need lens wider than 24mm to capture it all in one go (or wider than 90 on a large format camera). If you crop Rhum in half, photographs look wierd. So it’s either all or nothing. There isn’t anything behind you though. and the coast line either side isn’t particularly interesing. So getting creative on Eigg is a reall challenge unless you want to come back with a portfolio of multiple pictures of Rhum with different foregrounds in different weather. (You know, Rhum with stripy sand, Rhum with funky rocks, Rhum with white sand and boulders). I certainly didn’t dislike taking photographs of the coast on Eigg but it’s tough to do something original.

Click to view full post including No Comments

system asset

Monday
26 October 2009
24 Comments

Developing 4×5 Colour Film

This is another post for all you film users out there (and for those who are thinking about using film.. go on you know you want to!).

My impression of colour developing has always been that it is something of a black magic art. When I was a kid, we had a magazine called ‘you and your camera’ and they would talk about colour developing and enlarging and make it sound ultra scary. Because of this, I never really considered developing my own until I had a conversation with Baxter Bradford some time ago. He had bought a fully automated E6 machine (the Jobo 2500 ATL) and he described the results and made everything sound very easy.. As long as you had the automated machine.

Now at the time I set up a search on ebay that tracked whenever one of these would come up. One year later and I hadn’t seen anything. In the meantime, Dav Thomas was doing his own development using a Jobo CPP and getting good results. I carried on waiting.

The final straw came when I was talking with Richard Childs in Eigg and he was saying how easy it is to develop your own in just the very basic thermostatically controlled Jobo (CPE2). He then offerred to show me the developing unit when he came down to visit Charlotte and I when we were on holiday in Knapdale a couple of weeks later.

Well a few weeks came and went and we finally met up with Richard and spent the day taking photos and travelling around the Knapdale area and that evening, Richard took over our kitchen and told me I would be developing my own film taken that day! Now I don’t get stressed that easily but I’d taken a few pictures I really liked and I can’t say I wasn’t concerned about things. To cut a long story short, apart from the entertainment Charlotte and Richard had watching me analysing the timer intently and being over-careful pouring chemicals, everything went very smooth and to see your pictures arrive out of the wash was a revelation – how cool is that! thjese were the pictures I had taken a few hours earlier!

So now I’m hooked. Knowing how easy this was and also having it confirmed to me that I can have the same development quality of a pro lab but at 16p per sheet instead of £2.50p per sheet (plus saving on the cost and risk of post and packaing) finally convinced me to just get a bog standard bit of kit and have a go at it.

As soon as I got back from holiday, a Jobo CPE2 was acquired on ebay for £150 (I probably over paid but I was excited) and I’d ordered a bunch of chemicals from First Call Photographic (E6 & C41). Dav came to visit later in the week and sold me his 4×5 drum, reel and mounting station (thanks Dav!) and when the CPE2 unit arrived on the Thursday I was fortunate to have been left home alone and took full advantage in commandeering the kitchen for my first batch of self developed transparencies.

Now let’s have a blow by blow run through of what is actually happening..

  1. Mix Chemicals – You will be using four chemicals.
    1. First Developer – Mix: 50ml 1st Dev + 200ml water
    2. Colour Developer – Mix: 50ml Colour Dev A + 50ml Colour Dev B + 150ml Water
    3. Bleach Fixer – Mix: 50ml Bleach Fix A + 50ml Bleach Fix B + 150ml Water
    4. Stabiliser/Quickflo – Mix: 10ml Stabiliser + 240ml Water
  2. Set up a timer of some sort.. 6’30” first dev, 2′ wash, 6′ colour dev, 2′ wash, 6′ bleach fix, 4′ wash
  3. Fill up your Jobo CPE until the water will just covers the bottom 5 or 10mm of the drum that contains your film. (I’ll cover loading the film in a sec)
  4. Full your four wash bottles with water
  5. Water should be near 38deg C (which is just about warm hand hot) although I’ve processed accidentally at 36 and had no visible problems..
  6. Switch on thermostat and measure temperature in one of your water containers using a decent thermometer (not in the bath). Tweak thermostat temp until this reads 38 +/- 0.5
  7. You should have the three measuring jugs of 1st dev, colour dev and bleach fix sitting in the water too..

And go!! Pour the 1st dev into your film, give it a knock to prevent bubbles, start the timer and stick your drum on your CPE.

When the timer runs out, pour your 1st dev back into the measuring jug and then wash..

To wash, pour half of a wash bottle (125ml) into the tank and wash for about a minute. Pour this away and repeat with the second half

Follow the same process with your colour developer and then the same process with your bleach fix. and then a final wash cycle with 2min instead of 1 min per half bottle of water.

Open the top of your drum and flush with cold water for a bit under the sink and then put each of your transparencies into a tray containing the stabiliser solution (actually a weak formaldehyde solution).

And thats it, you just take each tranny out of the stabiliser after a while and hang them up to dry (I currently use a coathanger with picture hooks glued to it).

You can then re-use the chemicals with 30 secs added to each step and then again with 60 secs added to each step. (i.e. 7’00-6’30-6’30 and then 7’30-7’00’-7’00’

The only part I haven’t covered is loading the film. Well this just uses a spiral film reel which takes a single sheet per spiral. Richard Childs suggests using only 4 sheets per spiral just in case they protrude and hit each other.

Here are a set of videos taking your through the whole process. Each video is about 10 minutes long and is pretty much unedited. If you watch the all of the films, you will see every part of development process. Feel free to give me some pointers as I’m still learning and this was only my second batch of transparencies developed.


If you want to push your film, just add an extra couple of minutes to the first developer for one stop and an extra five minutes for two stops.. (I’m still working on this so any advice would be helped as the results have been poor)

Run? normal -1 +1 +2
First Run 6’30” 4’30” 8’30” 15’00”
Second Run 7’00” 5’00’ 10’00” 16’00”
Third Run 7’30’ 5’15” 9’45” 17’15”

The Results

The results so far have been excellent and the tolerance for cock ups is quite high :-) (good job!) The results of this batch can be seen in the sidebar (click to see larger images).

My next step should be to get a tank that will take three drums so I can do 12 sheets at once.. Or an intermediary step, just a spare reel so I can load another reel while the first is running..

p.s. If anybody knows of an ATL 2300, 2400 or 2500 for sale, please let me know as I may well be interested at some point. For the volume of film I’m currently developing, the CPP is fine though.

UPDATE: A few sources have said that it is best to add the water before the chemicals when mixing A and B parts. This makes sense to me, but like most things I’ve found out about the E6 process, things like this are advised but not critical.

UPDATE & WARNING: My slapdash approach of using chemicals in the kitchen and whilst making coffee is probably borne of working in chemical lab at GEC for a year. A certain Laissez Faire attitude was prevalent which is something I obviously absorbed (like the bromine, carbon tet and god knows what else). Be careful around chemicals in general, always clean surfaces with plenty of water and wipe down with a rag that you keep just for that purpose. Rinse the whole sink thoroughly, blah, blah, blah – you get the message. The good news is Stanley and I aren’t dead and it’s thanks to the E6 process (if it had been the Kodakchrome process I may have een a little more careful). Toxicity of E6 chemicals is fairly low but not zero and allergic reactions are a possibility. Do not bathe newly borne babies or small hairless rodents in first fev or colour developer!

UPDATE: I have found an Arista E6 guide that gives tables of what changes you can make to developing times if you don’t have exactly the right temperature. Now obviously this isn’t for Fuji E6 but the chemical processes are similar so it should give and indication of what might happen. Interestingly, it says that if you process at 70F you will get colour shifts and density problems (really!!? wow!)

70F(21C) 75F(24C) 80F(27C) 85F(30C) 105F(40C)
First Dev 26′ 23′ 20’30” 16’30” 6’30”
Colour Dev 7′ 6’45” 6’40” 6′ 4’30”
Blix 15′ 9’30” 9′ 8’30” 6’30”

UPDATE: Here is the Jobo E6 Manual, quite useful

UPDATE: In response to a comment on youtube about how many you can process/can you reuse chemicals. You need about 33ml for each 4×5 transparency so for 12 transparencies you need 400ml – however the tank for the jobo only takes 270ml so really you should only develop 8 sheets. It seems like theses standards are fairly conservative though and I’ve had OK results with Velvia and Provia on the third run (i.e. 12 sheets) using only 250ml of chemicals. I have had my Astia go slightly green I think (although I’m not 100% sure) so to be really safe, I would only develop two runs of 4 4×5 sheets with 250ml of chemicals … 250ml because it’s easier to work out :-) .. I’ve also put 16 sheets through just to see what happens and they came out OK as far as I can tell – more accurate testing is needed obviously… oh joy…

UPDATE: Joanne Carter adds that you should probably be careful of the first developer and colour developer cross contaminating each other, even fumes. I haven’t seen direct problems beyond a slight green cast in the third run of chemicals but only on Astia film. She also says to make sure your emulsion side is pointing toward the centre of the drum. Thanks Joanna!

UPDATE: Michael Gordon has posted a great video on how to process black and white film at your own kitchen sink too … just site and admire his pipette here How-to Video: Daylight Sheet Film (4×5″) Development

Click to view full post including 24 Comments

system asset

system asset

system asset

system asset

Saturday
24 October 2009
11 Comments

Eigg – The Movie

Back when Paul Arthur, Dav Thomas and I met up at the Light and Land beginning large format workshop in Bamburgh, we talked about going on some sort of photography trip together. I’m sure a lot of people do this “Wouldn’t it be nice to… ” sort of thinking but in this case, Paul actually organised something for us and got a couple of extra participants to come along, Tamara Kuziminski and Jenny MacLennan. Not only that be he got the accomodation, ferries and more accomodation in Skye and a stop in Glencoe sorted too!! Pete Bridgewood was going to be going at one point but chickened out because of a perceived risk of anaphylactic shock through exposure to Velvia (well ok, he couldn’t get the time of work) Richard Childs jumped in to bring the camera count to five large formats and a medium format! This was one of the interesting aspects to the break, a rollback of film photographers (collective noun alternatives gratefully accepted). Because we only take about four or five images in a day, we spend a lot more time really looking for subject matter and we’re quite unlikely to get in each others way.

We were also expecting some more company on the holiday as we found out that Bruce Percy was running his first Eigg workshop on exactly the same day with about 8 participants. This would bring the total of photographers on the island to 15 – making the island a stunning 20% populated by landscape photographers!!

You’ve seen my planning for the holiday, with the goal of camping up the Sgurr, but unfortunately, like most plans, it didn’t survive contact with the enemy; The enemy in this place being the dreaded lergy, possibly swine flu who knows. Whatever it was, Paul had it on the very first day as he drove me and Tamara all the way to Glencoe. We had a wander around near the Clachaig where we were staying but without much time and with little sleep, we were still in ‘getting into the groove’ mode which meant Desperately seeking ‘Compositions’ rather than Susans. It is strange how it takes some time for your brain and perception to start seeing the world in photographic terms (Wow, the colours in the fern around that tree and how the break in the path create a flow through the fram) rather than ‘object’ terms (i.e Must avoid tree, path goes ahead, feel wet). I think one of the skills that becomes developed as a photographer is being able to switch into this mode more quickly.

Anyway, the next day we had to get to the ferry to Eigg for about 10.15, which would have been fine apart from Paul and Tamara leaving the Morrisons in Fort William at 9.30 and the satnav saying we were going to get there at 10.30! Well Paul was having none of this and despite being flu’d up to the eyeballs and doped up to the gills, he made it to Mallaig with ten minutes to spare.

The ferry was a chance for Paul to collapse and this was pretty much the end of Paul for the next three days. However, I still had a day of well being left and so for the first evenings shooting we headed off to what Richard Childs has called ‘The Angry Place’. I was a little overwhelmed by all of this and only made one photograph that evening as for most of the evening I was just staring, gobsmacked at the geology and the beauty of the sunset (I left my 5D running some video as the sun was setting). Richard was making this at the time (you can see him perched precariously in the video).

Overall a slow start to the holiday with only a single casualty, but most enjoyable. The only difficult bit was following the road from the house to the coast which was only 10 minutes but passed through a bog beyond bogs and down a near vertical grassy cliff (think sheep tracks only). The sheep tracks were easy to find in the light but coming back in pitch black with no headlight (still packed up) was interesting to say the least. Good job I had my waders on (more about them later).

I’ve created a short video of the highlights of the trip which I’ve embedded here.

Click to view full post including 11 Comments

system asset

Monday
19 October 2009
38 Comments

Landscape Photographer of the Year

Take a View, the landscape photographer of the year competition. Well, what a pickle. I was (and still am) in two minds about posting anything about this competition as I have a personal relationship with Charlie Waite who is at the heart of it but as I’ve already put my views to him and am talking about the competition on Twitter and in person, I thought it would be hypocritical of me to balk at saying something just because the audience is different.

Firstly a little bit of background, I entered Take a View last year and submitted ten pictures, four of which were accepted to go through to the final round. Out of these four, one picture was highly commended and ended up in the book and at the exhibition in London. At the time I was reticent about entering mainly because it was a competition and I didn’t like the idea of being judged without really knowing what the criteria were. However, with Charlie being at the heart of the competition, I hoped for the best. The picture that was chosen wasn’t my favourite but I was quite pleased with it and I thought I understood why it was chosen above my other pictures. After checking, I realised that the majority of people judging the pictures were not photographers or photography critics and hence the results were being chosen for a variety of reasons, not necessarily because of the quality of the photograph itself.

This year I’ve been excluded from entering the competition because I am working for one of the organisers. This was sort of a releif as it meant that I didn’t have to decide whether to enter or not. Quite a few colleagues of mine entered however, including people I greatly admire such as Dav Thomas, .. However, only one of these photographers got anything through to the last round and that one only got a picture through that, whilst well caught, doesn’t represent the best photograph out of his submissions (It’s a very bold rainbow picture over a long exposure sea horizon by Jason Theaker which, whilst very stunning and deserves recognition, is one which I am sure he will agree is 98% eye candy).

This didn’t surprise me completely as having looked at the entries from last year, I started to realise that this is more about wow! and ooh! than about photography. i.e. it’s beginning to resemble one of the powerpoint slideshows of images that make the rounds of unfortunate inboxes all the world over. And this shouldn’t really be a problem, after all there are competitions all over the place and anybody can start one and choose whatever pictures they like…

.. apart from the fact that the competition is called “Landscape Photographer of the Year” and is run by one of the foremost landscape photographers in Britain.

Let me backtrack a little to one of the reasons I started to take photography so seriously.

In the US, Australia and New Zealand, landscape photography is considered an art form and forms a part of the whole structure of photography. In America Edward Steichen, Alfred Stieglitz, Ansel Adams, Walker Evans, Paul Strand, Timothy O’Sullivan, Edward Weston, Robert Adams, the list goes on.. landscape photography is at the heart of the nation and has been influential in the structure of the country. In Australia Frank Hurley set the scene and Peter Dombrovskis took it to a new level and changed Tasmanian history in the process.

The UK however, landscape photography has some cachet but it is nowhere near the level of respect that it deserves. We have some historic figures such as the historic founders of our photographic tradition and later on Fay Godwin. However, the art establishment has created an environment where you have to create deadpan, unsaturated pictures; an environment where Simon Norfolk, Jem Southam, Stephen Vaughan et al are acceptable but David Ward, Joe Cornish and Charlie Waite aren’t (I mention Jem, Simon and Stephen because I like their work). But it’s even worse than this in that the general public see photography as ‘easy’ and don’t appreciate that there is anything more involved in creating a ‘great’ landscape photograph beyond knowing how to use a camera, getting to a nice place and being lucky with the weather!

So … what does this have to do with Landscape Photographer of the Year? Well … Given that Charlie is one of the best photographers that Britain has had and that he has a competition called ‘Landscape Photographer of the Year’, the winner should be the best landscape photographer from that year? Here are a few of the preview news items for you to browse..

Well – do the results work for me and the people I have talked to? No.. Not really.. Some do show the requisite levels of competence in the craft of photography and also show skill in composition and even creative originality (Particularly Alex Nail, Ian Cameron, John Parminter, Anthony Brawley, Keith Naylor and Jason Theaker). But those are the exceptions..

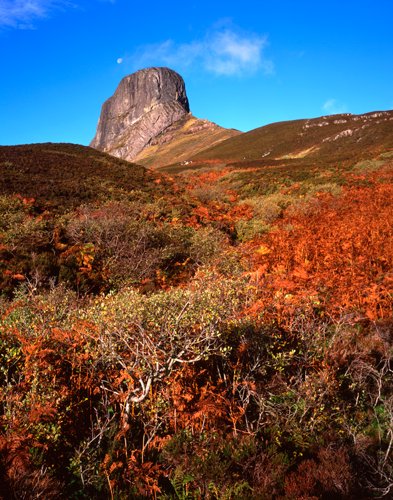
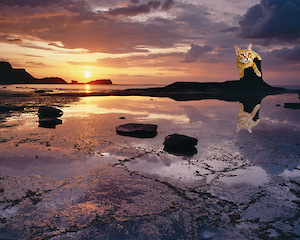
Try to imagine the pictures that you have seen on the newspapers preview sites sitting alongside the photographs in “World’s Top Landscape Photographers”? No, I can’t either.. Perhaps the four I’ve mentioned (although they have better photographs in their portfolios and I imagine, and in some cases know, that they entered). Lowlights including a picture of a Hermit crab with a photoshop’d reflection and a new sky by the looks of it (see Crabgate on Flickr); more animals (cute or not); a particularly bad HDR that won a category; The Bregagh Road beech trees, Buachaille Etive Mor, Sycamore Gap, Mist at Corfe Castle – these are great locations, not necessarily the result of great photographers;

So.. now I’ve finished sounding like a complete miserable git and slagging off everything in site, what suggestions do I have? Well… for one the competition should probably be called “Landscape Photograph of the Year” or better still “Britain’s Best Views, 2009”. My primary concern is that the ‘Landscape Photographer of the Year’ is judged by a panel with vested interests in things other than photography and is judged on a single picture. The result will very unlikely be taken by the best landscape photographer. Just to get this clear, I have no problems with the competition itself, there is nothing inherently wrong with it. What is wrong is the public perception that this represents the best that landscape photography has to offer in the UK, a perception that I took to be true when I initially entered.

And what can you do about it? Well.. I’m not going to recommend not entering, that would be wrong. But you should know what you are doing when and if you enter next year. Be aware of what the competition is and what it means and don’t get caught up in the myth that the results mean anything any more than that you have won or lost a competition.

For me, I intend to do my best to ensure that next year there is –

  • a competition that is run by British landscape photographers, for British landscape photographers.
  • a competition that conforms to a broad but generally accepted definition of what landscape photography is about.
  • a competition that is judged by a portfolio of images.

I don’t know how to best achieve this yet but I promise it will happen…

I would like to know what people feel about this. Is my point of view irrelevant?

I’d also like any of your ideas on how you think a competition like this should be judged and what criteria are important.

I would really like to stress that this is not intended as a ‘bash Charlie’ post. Charlie has created a hunger for landscape photography in the country and for that he should be applauded. He’s also a friend with whom I have spoken about these issues previously.

Finally – here are some of the notes I made whilst looking through all of the pictures that we’ve seen so far in the press

The Great

Ian Cameron , Crimson Chill– very nice in many ways, strong composition, good light, original location.. (oh and the family tree is good too)

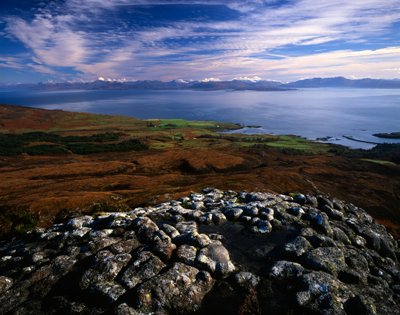
John Parminter, Buachaille Etive Mor – despite the commonly captured subject taking a lead, the execution, composition and light are excellent.

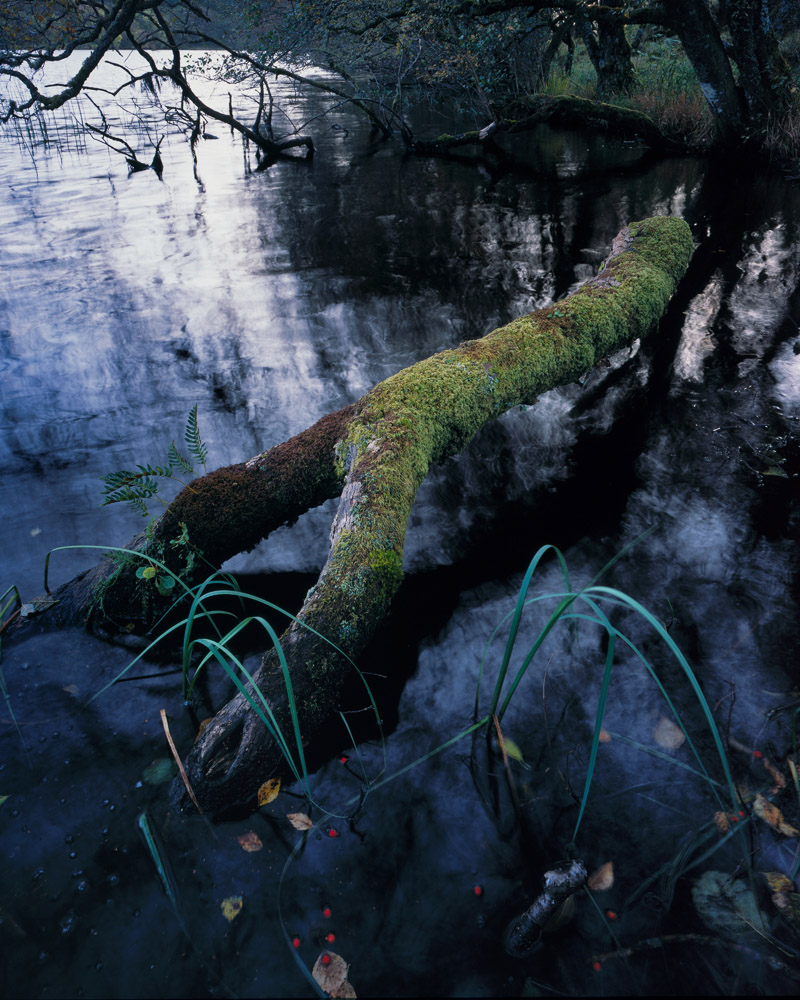
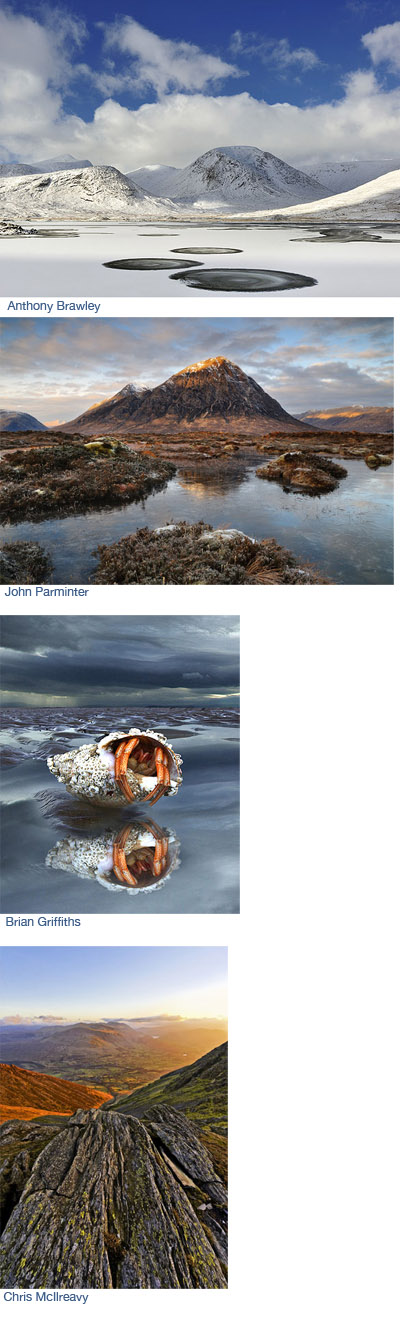
Anthony Brawley, Loch Dochard – A great find and wonderfully captured. Strong composition, complementary weather.

Keith Naylor, Herringfleet Mist – If you want a picture of a windmill at sunset, this is pretty damn good..

The Very Good

Pete Bridgewood, Great minimal work, very Pete Bridgewood and a nice continuation on a theme.

Jason Theaker, Elemental Metamorphosis. A well captured photograph that simplified the rainbow into something more primal (if over processed slightly by my tastes)

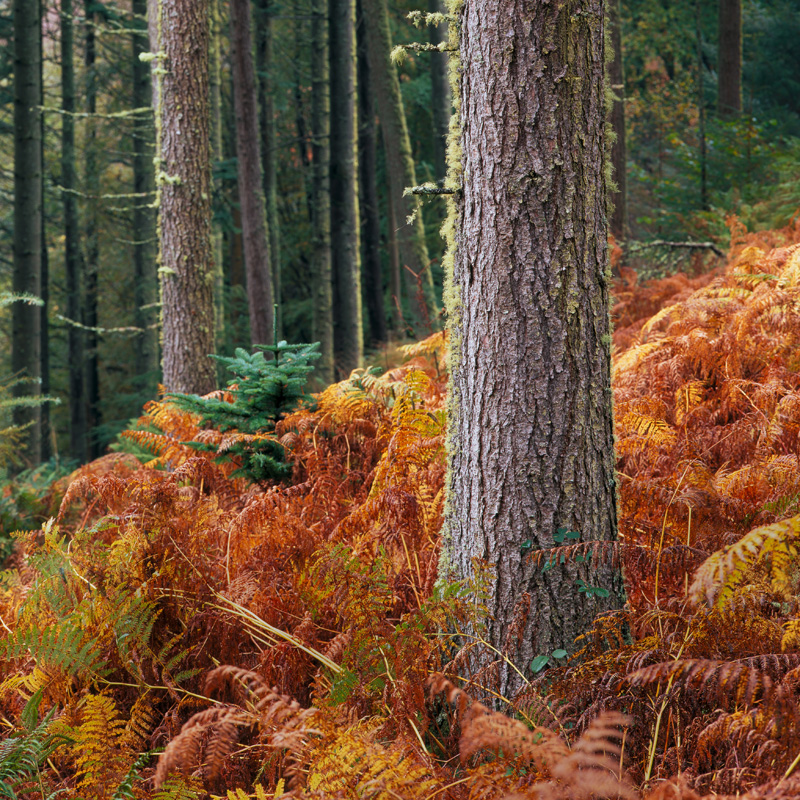
Alex Nail, Burrator plantation – great shot, great composition, great light… very nice indeed and a rare capture..

The OK

Nigel Hiller, Hebden Bridge – wonderful light and a good composition.

Nicky Stewart‘s Lighthouse – Very competent, dramatic photograph. Not sure it’s world class though..

Claire Carter‘s snowdonia. Great light well captured with a reasonable composition.

Mike Hughes, Loch Ossian – Atmospheric but doesn’t keep my attention

Paul Knight – Good black and white composition well toned.

Don Bishop, Hoar Frost – Well taken but not particularly moving

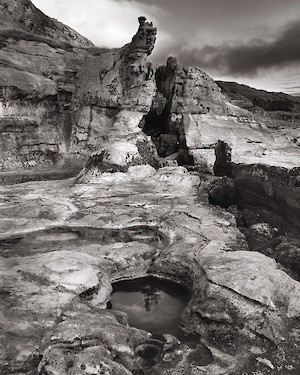
Anthony Burch, Old Bathing Place – A nice scene but not particularly resolved composition

Alan Cameron, boats and reeds – a beautiful picture if a little cliched..

Mark Lakeman, Binary Code – I like this. The idea is strong but it misses slightly in execution – almost great though

The Rest

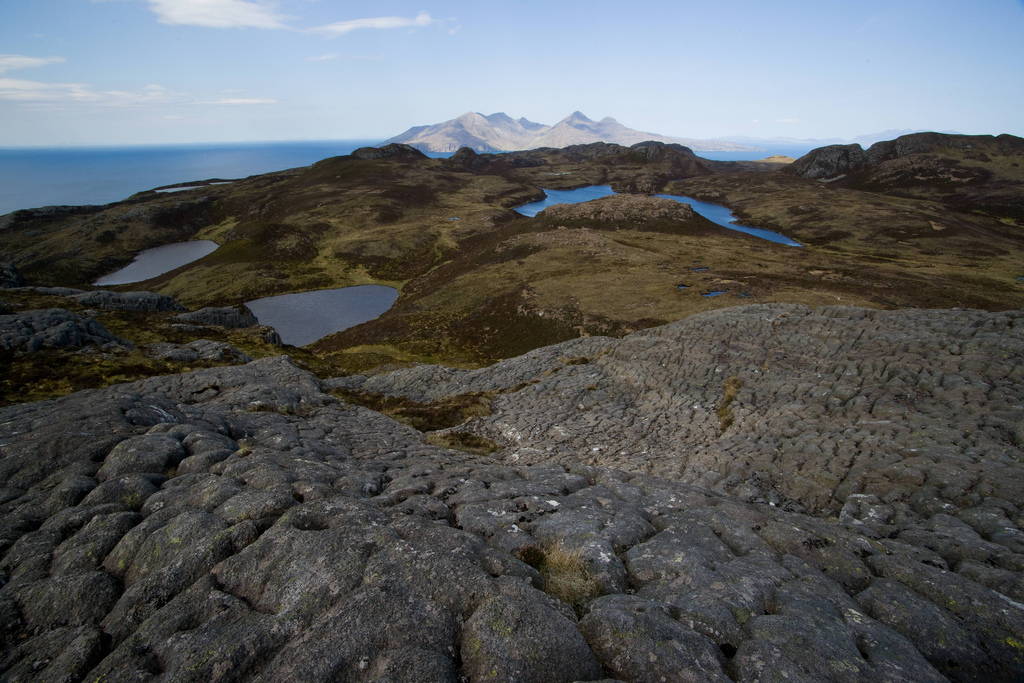
overall winner, Storr – competently captured but badly processed. Relies on lucky weather and a location based cliche (i.e. The location is more important than the composition and it has also been done better before). What is going on with the horizon and the big lump of rock on the right?

John Parminter’s Your View – a good shot but a cliche perhaps?

National Park Winner – Bad HDR on an average composition but with some nice light

Peter Cox, Dark Hedges – is this going to be a winner every year?

Graham Hobbs, Kingston Lacy – The hulk rides a bike down a cliched location..

A cliched shot of the lit up tent at sunset.. nice but not landscape photographer of the year really..

Horse Pictures, Dog Pictures, Documentary pictures of runners, urban architecture pictures?

Tim Morland, South Downs – it’s a nice picture but it doesn’t do a lot for me.

Dartmoor national park picture by Adam Burton.. nice sky – not really much of a composition (and over polarised IMO)

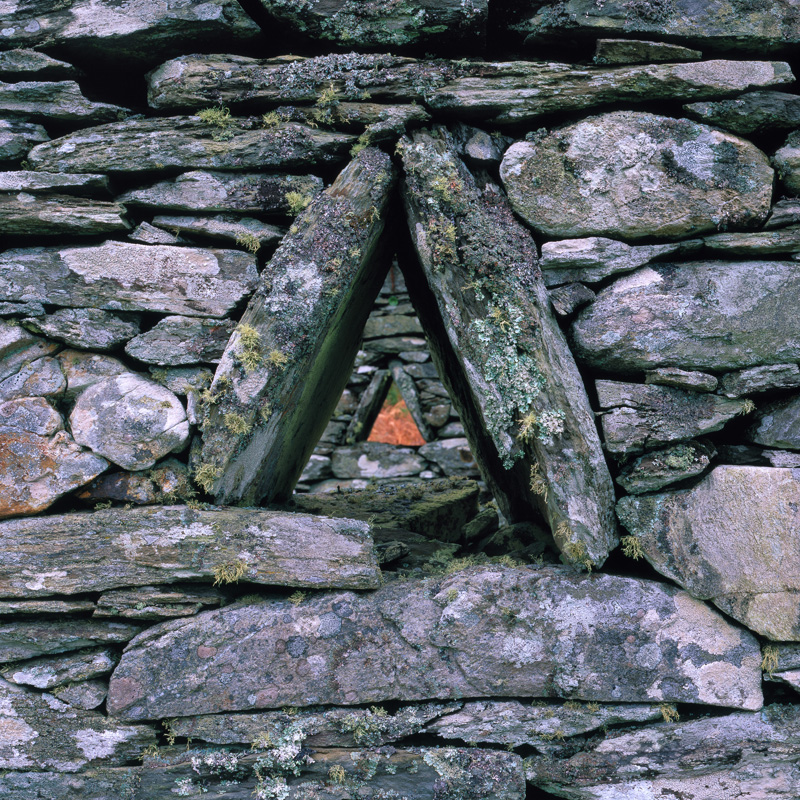
North Yorks Moor winner – some nice light and a cross .. hmm

Sycamore gap?? Oh please!!! Stock photography? yes! Landscape photographer of the year? No!

Mist at Corfe Castle – another standard that I’ve seen done better. At least it’s a competent photograph with good atmosphere.

The crab – oh dear. Please see my flickr page for details..

The poppies by Bungh Huynh are competent again but far from an inspiring example of the best of british photography..

UPDATE : The topic has also been discussed at the flickr landscape composition group and at the large format photography forum and a non-photographic viewpoint over at The UK Climbing Forums

Click to view full post including 38 Comments

system asset

Sunday
18 October 2009
4 Comments

Catching Up!

Wow! So much to catch up with that I’m a little scared of the computer at the moment. As you probably know if you’ve been reading previous posts, I went to Eigg recently with a few other strange photographers (by strange I mean we use film cameras where you have to pay for each picture you take. This may be a strange concept for some people but I’ll come back to that later). Following this, the company I work for went through a stupidly busy period where I didn’t do anything else for two weeks apart from write computer code and sleep. Immediatly after this Charlotte and I went on a two week holiday in Knapdale (family style holiday but with a bit of photography thrown in the mix). Now I’ve got the excuses out of the way, lets get back to business. I’ll try and summarise things by saying that Eigg was stunning but we were all laid down with flu and Knapdale was stunning, if hard work, and I got to learn a lot.

So I’ve got some writing to do .. I’ll try and get a daily report on the holiday (for my personal records and also to post a picture from each day of the trip and any lessons learned) and then I’ll write a little about some of the things I’ve been playing with such as sheet film, Portra negative film, roll film, developing my own film, drum scanners, alternative aspect ratios and a couple of book reviews (Joe Cornish, Jan Tove, Peter Dombrovskis). Hopefully that will get me to the end of the month and then I’ll have a little announcement about a new website I’ve been building (for another photographer).

So – best get back to the keyboard to try and churn out some content.

Click to view full post including 4 Comments

.

Wednesday
2 September 2009
6 Comments

More Eigg Photos

After my recent post about scouting locations using the Internet, Neil Bryce and Richard Childs sent me some more pictures of the area. Since then Richard has also confirmed he will be coming to Eigg with us (us being Dav Thomas, Paul Arthur, Jenny McLennan (see the latest issue of Outdoor Photographer) and Tamara Kuziminski). Its panning out to be an awesome week and with the bumper bonus 120 film and holders that Mr Cornish has contributed, I don’t think I’ll be short of some stock (although I had best be careful with the Velvia quickload with it’s replacement price of £90 for 20 sheets!!).

Click to view full post including 6 Comments

system asset system asset Richard Childs

system asset system asset Neil Bryce (click for larger)

Monday
31 August 2009
6 Comments

Nigel Halliwell

I met Nigel Halliwell during Light and Land’s Discovery Day in 2008 after being very impressed by his Large Format photographs that he had published in the Light and Land books. I worked with him to create a website that could really promote his work and in return he helped me learn about using the large format camera in the field. Nigel’s pictures continue to be a surprise and pleasure any time he puts new work up. I’m posting this to introduce those who have not seen his work to a wonderful photographer.

Visit his website (for which I can take a small amount of credit) at http://www.nigelhalliwell.com

The image to the right is one of my favourite pictures of late and one that I’m quite jealous of (but don’t tell Nigel that!)

Click to view full post including 6 Comments

system asset

Saturday
29 August 2009
1 Comment

Tide Levels

The one thing I left out of last weeks blog post was information about tides and how to work around them. There is lots of tidal prediction software out there but I use ‘Mr Tides’ which does as good as any. The main thing to be concerned about is ensuring your tide program displays the sunrise and sunset times. This becomes very useful when trying to target a particular shot. Tidal prediction software isnt the end of the story however, three other things can effect the tide level.

Local Conditions

You can only generally get tide tables for a few different locations and so wherever you are, it is unlikeley to have the exact position specified. Generally, the water level will only vary by small amounts but if you are working somewhere within a harbour or tidal lake/loch, it may take the water longer to get into the area you are working which could cause delays of up to 30 or 40 minutes (I can’t find much information about this apart from conversations I have had with sailor friends. Any confirmation or refutation would be appreciated).

Wind Conditions

A strong and/or consistent onshore wind can push the water into the land (mostly getting traction on the waves) causing a ‘pile up’ and creating a possible 20-40cm increase in tide level. The opposte effect wil happen with an offf shore wind. Winds blowing parallel to the coast will advance or retard the time of high and low tide (by up to 20 mins or so) check the tide time further down the coast in the direction the wind is coming from.

Atmospheric Pressure

Tide tables are provided for an atmospheric pressure of 1013 hPa. However, for each additional Pascal of pressure, you get a 1cm lower tide (and vice versa). Pressure changes are not instant however and it can take hours to get a change in tidal level for a change in pressure (it takes longer on the east coast than the west coast according to my research?).

Overall, if you have very low pressure and strong onshore winds, you can have an enormous additional three meters of ‘storm surge’. Add this to a spring tide and you can understand why you get flooding.

Sand Erosion and Deposition

Whilst I was researching this, I also researched atmospheric effects on sand deposition and erosion (in an attempt to predict a good time to go back to Whitby Bay). The data is difficult to find but a couple of general rules can be inferred from the resources I read.

1) Calm summer weather causes sand levels to rise
2) Rough winter weather causes sand levels to lower

A consistent wind blowing along a shoreline transports sand up the shore in the same direction. This effect happens because as waves come in the sand is pushed up the beach a bit and then as the waves come back they move back again. The general movement cancels each other out but if the waves are coming in at an angle, the up and down movement will also include a sideway shift. For whitby beach (below the fairground) you really want the end of a strong winter storm with winds coming from the south.

Click to view full post including 1 Comment

system asset

Don't get caught out like pebbles the landscape cat!

Sunday
23 August 2009
20 Comments

Using the Internet to Scout a Location

One of the key aspects of successful landscape photography is preparation and planning. Even for those photographers who like ‘mindful’ photography still choose where and when to go somewhere. In ‘olden times’, planning meant an Ordnance Survey map and a sun compass, which was obviously good enough for a whole legion of landscape photographers but the Internet now provides us some stunning new tools to plan a photography trip.

In order to illustrate how we can use these new tools, I’ll use my up coming trip to Eigg as an example of how I use these tools..

General Overview

The first thing I did was to take a general look around using Google Earth. This first shot is just an overhead view, the same as you would get using Google Earth so no big shakes yet.

system asset

The next is a 3D shot showing the way you can position your point of view. Here I’ve gone for the ‘standard’ Eigg Laig shot with a slightly higher angle as a bonus.

system asset

system asset

The next shot gets a little more interesting. Google Earth has had sun simulation for some time but it’s only recently had the ability to change the date so you can see where the sun will set and also, more interestingly, where your twighlight glow will be..

system asset

Another program that does the sunrise/sunset thing (but has a lot more features) is the Photographer’s Ephemeris by Stephen Trainor. This is a stunning little peice of software is simple to use and gives you nearly all the information you need.

system asset

As a quick aside about this program, click here checkout this blog post from Stephen explaining how you can use his program to calculate the relative angles between different locations to see just when the sun will crest that mountain. This is not straightforward to do but is invaluable when planning a particular shot or ensuring you are up the mountain at the right time. I’ve just used it to find out that the Sun will scan over the tips of the mountains in Fairy Pools, Skye starting at 9.30am (where actual sunrise is 7am). Anyway – on with the story..

However, as I was looking around the island using Google Earth, I noticed some interesting looking lochans near the Sgurr and Google Earth shows lots of shots from Panoramio (Google’s version of Flickr).

system asset

I took at look at the 1:50,000 overlay map overlay (available from Gavin Brock’s website and not officially licensed for Google Earth but it works unofficially very well indeed.

system asset

So this looks like somewhere nice to camp out overnight so I tried out another useful tool called ‘Hey What’s That?’ which can show you the view on the horizon from any point. I set it up to look at the view from the lochan I was interested in. This clearly shows Rum and the other small islands as well as the fact we can see the far mountains on the horizon. The ‘cloaking’ view shows in red the areas where you can see from the top of the island.

system asset

system asset

I can take a more detailed look at the area with Multimap’s new OS button that gives you interactive access to the OS Explorer 1:25,000 maps.

system asset

One extra tool that I use to take a wander around an area is called Geograph. It’s an open source attempt to get a photograph for every square kilometer of the UK. However, it’s already managed most kilometer squares and in some places is going past that to 100m squares. Here is a sample area covering Goredale Scar in the Yorkshire Dales.

system asset

Which you can plugin into Google Earth by downloading the KML file (just click on the KML link of the Geograph home page). I’ve also added flickr images to this Google Earth view around the Sgurr of Eigg. The red dots are flickr pictures, the tiny thumbnails are geograph pictures, the blue dots are panoramio pictures/

system asset

Finally, with the proviso that some people may not like this bit, I like to use Flickr, Alamy, Corbis and Google image search to browse around items of interest around a target location. This gives me an idea of potential features, geography, etc. I stress that I don’t use this to plagiarise compositions although I won’t avoid a shot whilst I’m on location because I’m reminded of one I saw previously.

These are some of the results for the area around the peak I’m interested in on Eigg.

system asset
by Sue White

system asset
system asset
system asset
system asset

This is just a quick overview of the tools I’m using to plan trips out, if you want to ask any questions or have any additional online tools you find useful, let me know and I’ll expand on this article a bit..

Don’t forget though, there is nothing more important than legwork once you are out there. I’m hoping to camp in the hollow near the small lochan at the north end of the ridge, having taken some sunset shots and in preparation for some dawn glow around the geological features that surround the area.

If anybody has been up to this ridge, I’d love to know your experiences and any tips!

ADDENDUM: More pictures in another blog post

Click to view full post including 20 Comments

system asset

Thursday
20 August 2009
25 Comments

Prancing with Filters

I’m not sure about you but when I hear that photographers are ‘hand holding their graduated filters’, I’m a little suspicious that they can get the accuracy that is required for any sort of creative placement. i.e. If I find it hard to position a grad using a filter holder and depth of field preview on my 5D, how the hell are you doing it by just waving the thing around. Well it seems that I was underestimating the condition that some of these photographic technicians suffer from. I was looking around some photographic video tuition on youtube and found one by Steve Kossack where he demonstrates this “art”. Have a look from 3’51” to 4’15”

Now from what I can tell, this is a 2 stop soft filter on a 24-70 lens which means that the graduation is covering more than the whole of the frame. Effectively, there is about a 1.5 stop filter and whilst he moves it up and down he is just adding and removing about a third of a stop (twisting it around is not doing anything more than adjusting the average angle of the graduation by a ten degrees or so). What he is doing by this maneuver is gradually digging is way through the filter causing scratches and potentially some nasty veiling flare.. I can imagine the conversation when he goes back to Singh Ray with it…

Steve: Hey Mr Singh Ray, Why do I get so much flare with your filters?
Mr Ray: If you look carefully, you may be able to see where you’ve WORN THROUGH THE BLOODY FILTER YOU IDIOT

No disrespect to Steve intended, but I think even if you don’t rub your filters to death, some of the facts of hand holding need to be addressed.

1) “I can dodge and burn certain areas” – no you can’t.. the only shape you can make by twisting you grads is potentially a X but with the top quadrant at 2stops, the side quadrants at 1 stop and the bottom at 0 stops.. Some variations on this are possible (i.e. smaller angle for the top V, smoother graduation between the quadrants) but they all essentially add up the the same. However, if you want to do this sort of configuration (and it can potentially come in handy, I’ve used in the Glencoe valley but with two grads – see below for image) the accuracy you need potentially requires proper mounting anyway (bluetack may be a possibility?!).

system asset

2) “I can soften the edge of the grad” – yes you can but if you need to adjust the edge then you must be working with a fairly hard edge grad and if you are working with a hard edge grad you probably need to be placing it to an accuracy of about 5mm or so. Can you guarantee that sort of accuracy hand holding whilst “adding a bit of movement to blur the edge”? Just buy some extra grads.. (If you want to save money then it’s probably worth playing with but you probably want to buy some extra hard grads from Lee so that you have better control).

3) “It means I can work quicker” – yes potentially, although if you have lee adapters on your lenses, I think you’ll find working more accurately is worth the extra 20 seconds to slide a filter into a holder and stick it on the lens.

I don’t suppose I’ll convince anyone to change their behaviour and it seems a trendy thing to do. I make one concession to the technique though.. If you can only afford one graduated filter and no hardware, getting a Lee 2 stop hard and hand holding is probably better than buying a Cokin to save money.

Click to view full post including 25 Comments

system asset