Finding Your Landscape Photographs
A second trip to the Peaks saw Dav and I in Padley Gorge – I keep on getting fascinated by the colour of the mosses down there and the way the ambient light seems to make them glow (especially when you use a polarising filter). This time I’d found a branch that obviously had a little navigational problems. A few people ask me how I find compositions when in woodland like this and so I though it might be enlightening to show you a few pictures I took as I was trying to find something to capture and also as I worked on the composition.
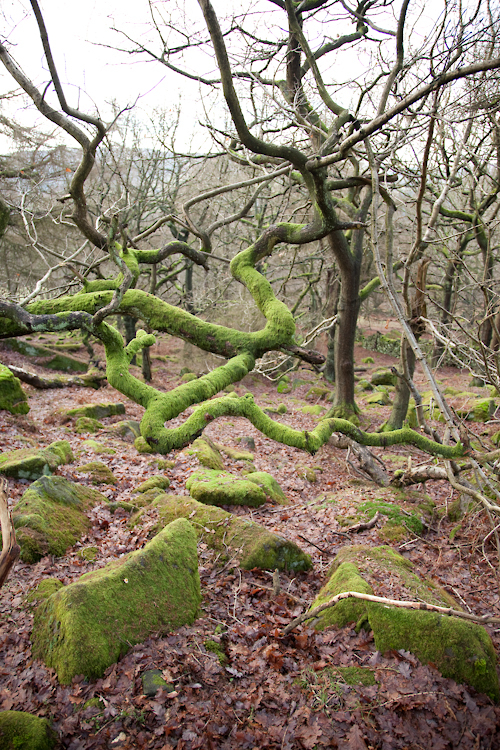
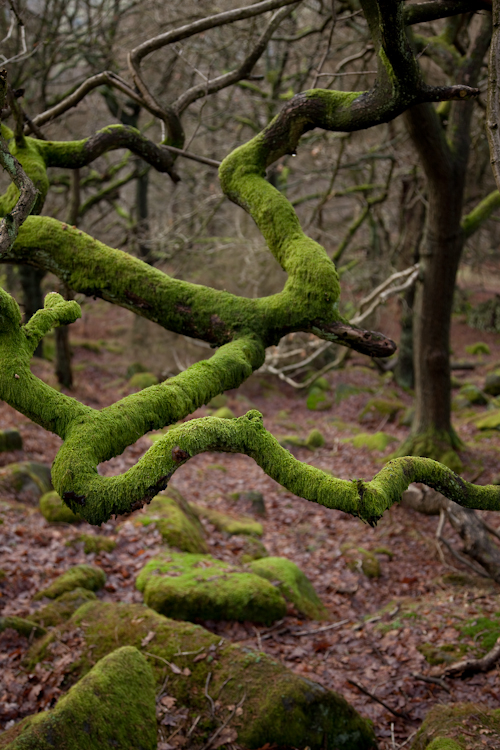
The first thing that you have to know is to close one eye! This is essential as if we don’t, we see far too much interesting 3D structure to be able to pick out the 2D shapes. The second thing is to move slowly and be constantly looking around (preferable only look around when you are standing still as you will still ‘see’ in a form of 3D by interpolating the way things move against each other). The first thing that I saw in the woodland that captured my interest was just the mosses. Quite a few branches was draped with this wonderful green moss and I started to walk around, looking at each area of moss, trying to identify interesting shapes or backgrounds. The first area I saw that started to look interesting is shown below.

The area that interested me was the curving branch just above and to the right of my camera bag. The next step was to get a bit closer and examine the area.. I could see the branch itself was going to be the focal point, the next step was to look around at the background of the branch and also to see how the shape of the branch changed as you looked at it from different directions.
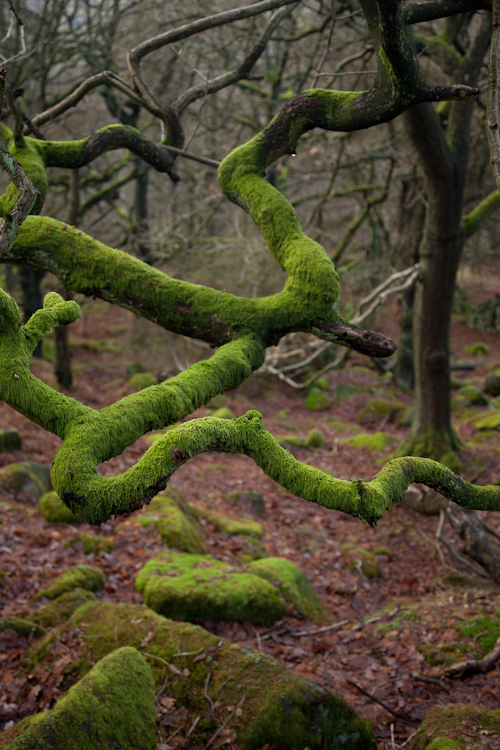
I decided quite quickly what part of the branch I wanted to photograph but as I moved around the scene, some of the background to the branch made any potential picture very fussy. Here th left hand part of the branch itself is fussy and the tree in the background is quite dark and cuts through the area of interest.
This picture shows the angle where most of the elements of the picture are lining up OK.. The area below the branch is still not quite perfect, there is a little too much leaf litter showing and the green rock is touching the branch. The next step is to work on cropping the area of the branch I would like to take a picture of.
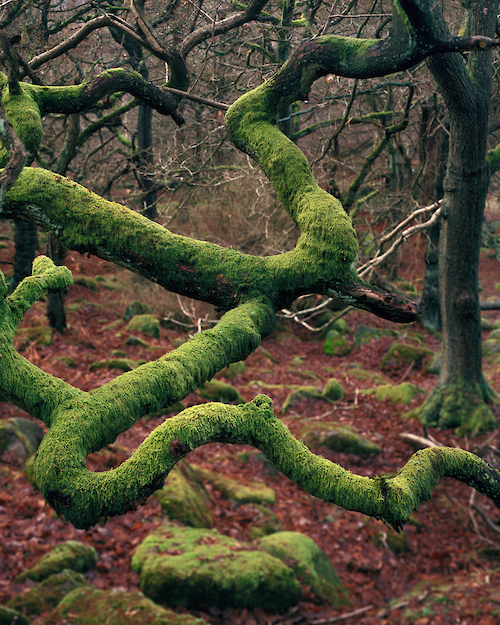
The next step is to start working with focal lengths to see what happens when we zoom in and out. This step effectively allows us to ‘scale’ the background of the image, to include or exclude elements. For instance, this is only a minor tweak but I wanted to close up the gap below the bottom branch and also didn’t like the small branch that shows in the following angle..
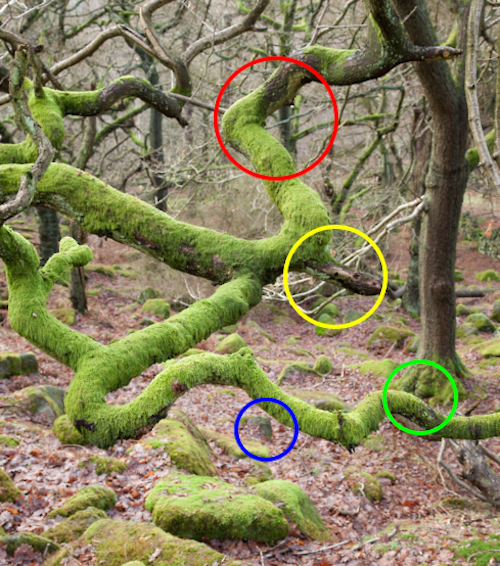
In the red area, I wanted to try and tuck the tree trunk behind the branch a but more. The yellow area the same, hoping to move the trunk just above the yellow area to the left a bit and also to hide a bit more of the white branch (or at least don’t have the white branch contrasing against the very dark bit of branch in front of it. The blue area needs closing up a little and hopefully hiding the stone and finally, I would like the path of the eye following the bottom limb of the branch to get to the green area and then to continue up the trunk. So hopefully moving the background to the left a bit and also shrinking the background slightly (lifting the bottom up and moving the right hand side in a bit).
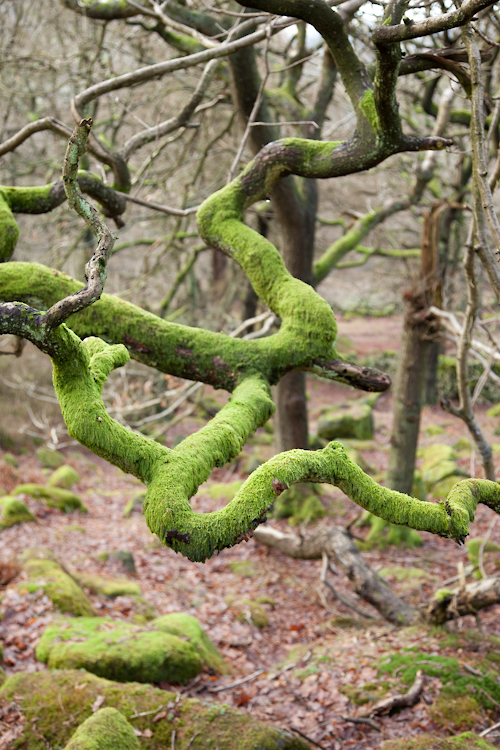
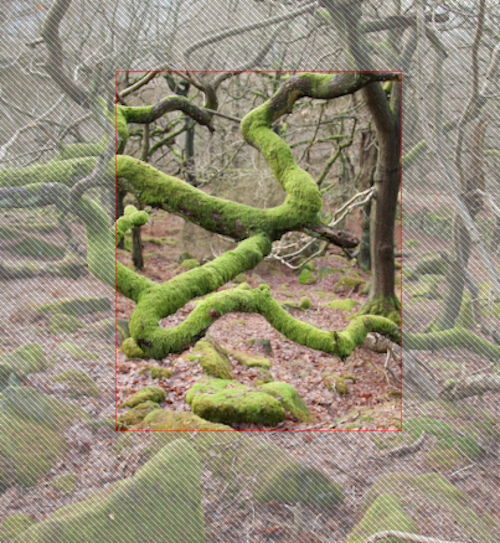
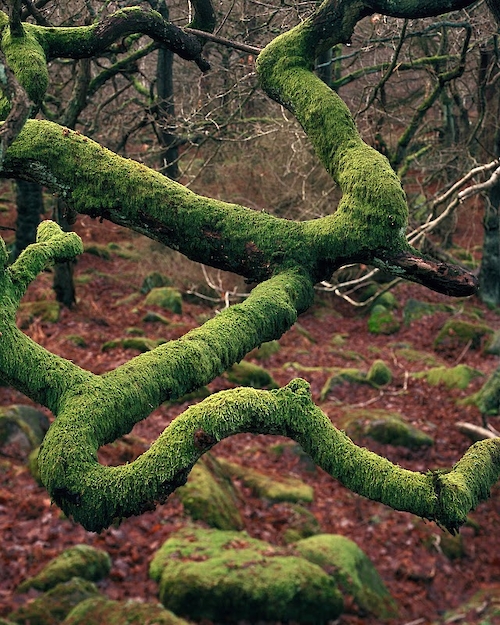
You get this effect by zooming out whilst moving toward the subject, trying to keep the subject the same size in the frame using the zoom. This gives you an effect not unlike the bit in Michael Jacksons thriller video where his head stays the same size but the background falls away rapidly (over used to much effect in many horror films since). Anyway – the overall crop and composition I was after is now shown below.
Now the next thing to add is a polarising filter, hoping that it will help darken the highlights in the scene, ultimately creating less contrast and boosting colours in the process.
And finally, set up the large format camera and do some focus jiggery pokery (A combination of tilt and swing allowed me to get the branch limbs in focus but in the process gave me a small depth of field at the bottom of the picture where the depth of field wedge was ‘pointy’ and a larger depth of field at the top of the picture. ) and some last minute composition fine tuning.
And finally – I thought seriously about a crop when I was taking the picture, I’m not sure about it though. I quite like the way your eye travels back up the tree trunk on the right however the crop has the advantage of being a very simple, clean composition. Any thoughts?
Oh – I took another couple of pictures whilst I was out and I’d love some feedback on them as they aren’t my usual style of composition. They’re in the sidebar after the wiggly branch shot (sorry about non-‘artistic’ photo names – how about “Druid Soul of the Half Shade”)
12 Responses to “Finding Your Landscape Photographs”